Posted on January 26, 2025 • 9 minutes • 1745 words
Table of contents
- 2025 The year of the Linux Desktop! My WSL Ubuntu on Windows 11 Explained.
- Conclusion
- Table of Contents
- What stops you from coding like this?
- 1. Introduction and Prerequisites
- 2. Hostname Configuration
- 3. SSH Key Generation and Git Setup
- 4. Installing and Managing Repositories
- 5. Installing Essential Developer Packages
- 6. Installing and Configuring Rust
- 7. Installing and Setting Up Neovim
- 8. Installing Docker
- 9. Extra Shell Enhancements
- 10. Wrap-Up
“The only thing we have to fear is fear itself.
”
— Franklin Delanor Roosevelt 1
Trying new things and challenging old beliefs is scary sometimes, but it’s also a great way to grow. While it’s fresh on my mind, I decided to document and share my initial setup of WSL Ubuntu, along with some creature comforts and personal preferences. Feel free to peruse each section and try out anything you like in your own system or VM.
2025 The year of the Linux Desktop! My WSL Ubuntu on Windows 11 Explained.
It happened, I installed Windows. A simple, unremarkable thing most of the time, except I’ve barely tolerated going near Windows since leaving the Microsoft side of the house and diving into the enterprise Linux and Cloud Operations practice circa 2017. I broke from a lifelong interest in computers dominated almost exclusively by Microsoft, abandoning the Gates empire by jumping into exclusively Linux for over five years spanning dozens of distros and many generations of each.
Why branch out now? Well, frankly, I was finally convinced to try a little gaming, and even with a well-spec’d Mac and Linux box at my disposal, Microsoft has a unique kind of entrenched monopoly over the PC gaming market and now here we are.
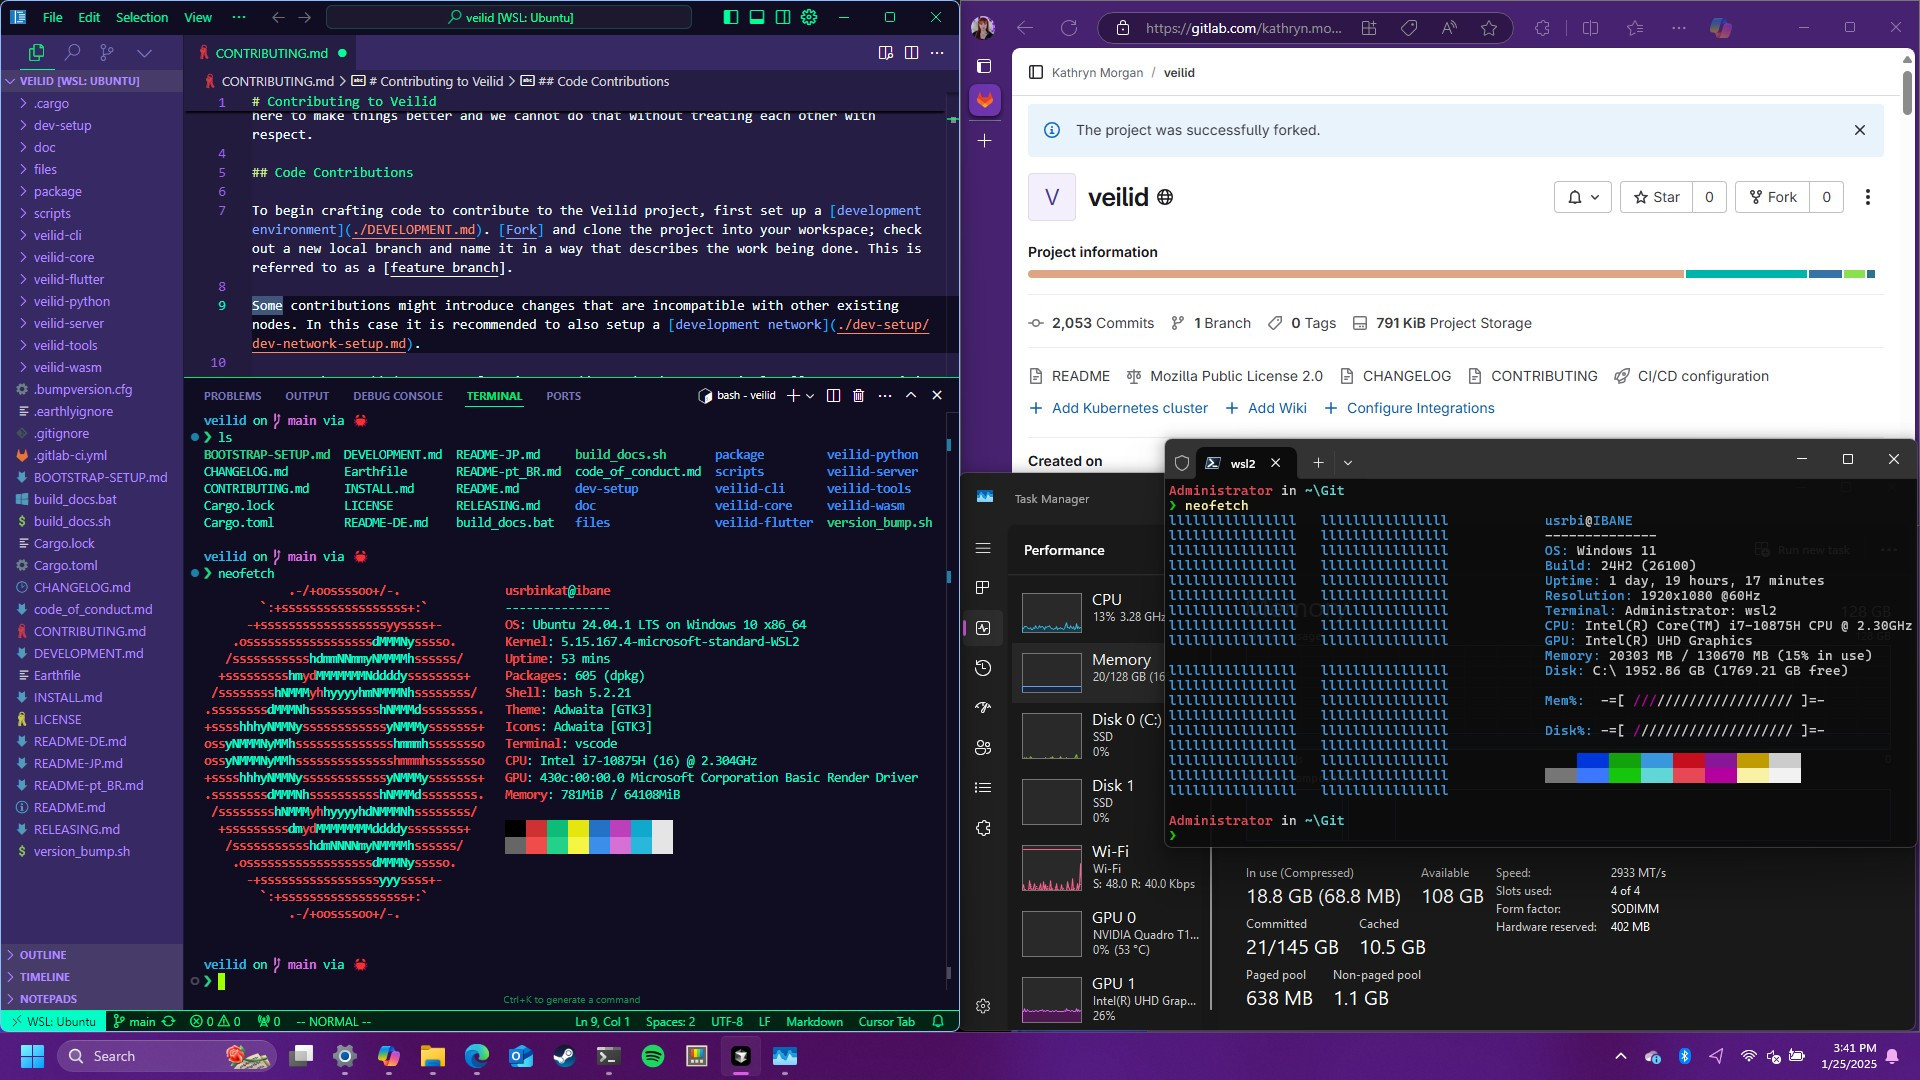
The pleasant surprise for me was the remarkable progress in power-user features and a far more intuitive interface since my last major exposure to Windows. From the native tiling and forward-thinking touch gestures to the maturity of Windows Subsystem for Linux 2 (WSL2) for development, it’s almost like a whole new Microsoft. I was already an avid user of Microsoft Edge, VSCodium-based IDEs , GitHub Codespaces , and, at times, work heavily in Microsoft Azure .
I’m not yet sure how long I’ll continue using Windows as my daily driver, but I must say: I am impressed. Windows is back in the ring as a strong contender for earning the top spot as perhaps the best developer environment out there.
Conclusion
Conclusion before ToC because life’s short so eat dessert first, y’know?
Sometimes, even the most entrenched beliefs deserve a second look. The tech landscape is a constant sea of change, and what was true five or ten years ago may not reflect the current state of affairs. Windows is absolutely worth revisiting if you’d sworn it off before. The level of innovation is impressive, and for those of us who need to get work done, having multiple strong options can be a huge advantage.
Windows has come a long way, and thanks to the efforts of the WSL team and others, it can easily go head-to-head with more traditional Linux environments for serious development. When you combine it with powerful hardware, the convenience of the Microsoft ecosystem, and an environment that feels more Linux-like than ever, you may find yourself surprisingly comfortable.
By the end of my first weekend project, I’ve achieved a comfortable, feature-complete WSL dev environment, and you can too by following along below.
Now enough of the life story first recipe blog style distraction. Find the instructions and try them yourself below. Find me on Bluesky if you like the post and share if you think I’ve lost my marbles or if this helped you in any way!
As always, build things, break things, and happy hacking to all my builder and tech explorer friends!
Table of Contents
This guide is an a la carte menu of how I personally set up a new WSL Ubuntu environment—feel free to pick and choose what’s helpful for you.
- Introduction and Prerequisites
- Hostname Configuration
- SSH Key Generation and Git Setup
- Installing and Managing Repositories
- Installing Essential Developer Packages
- Installing and Configuring Rust
- Installing and Setting Up Neovim
- Installing Docker
- Optional Enhancements
- Wrap-Up
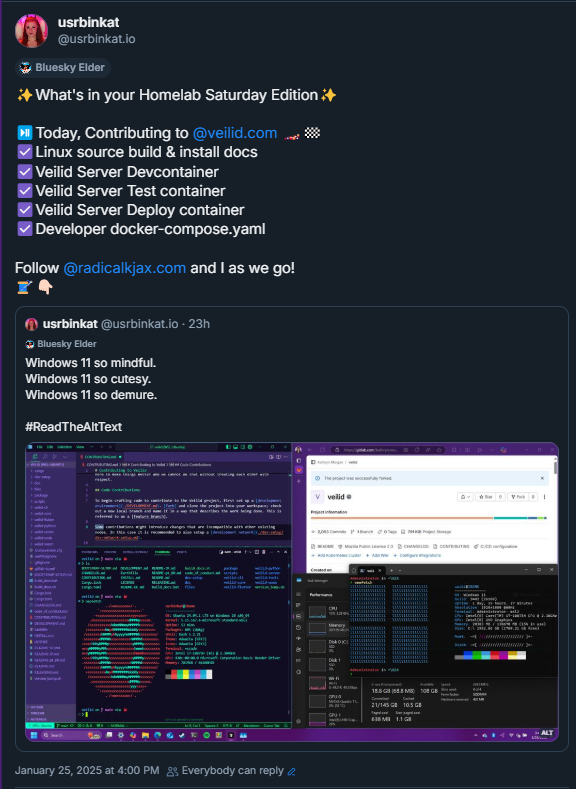
What stops you from coding like this?
See the setup in action on Bluesky!

1. Introduction and Prerequisites
This guide assumes you already have:
- Windows Subsystem for Linux installed and set up with Ubuntu.
- WSL up and running on your Windows machine.
If you are brand-new to WSL, refer to Microsoft’s official WSL Documentation for installation steps before proceeding.
2. Hostname Configuration
Purpose: Set a custom hostname for your WSL CLI.
- Set a new hostname:
sudo hostnamectl set-hostname windows- Replace
windowswith any hostname you prefer. - This will update your system’s hostname immediately and persist across sessions.
- Open a new shell to see your new hostname in effect.
- Replace
3. SSH Key Generation and Git Setup
Whether you use GitHub, GitLab, or another service, having a proper SSH key and CLI tooling can simplify your workflow.
3.1 Generate SSH Keys (RSA 4096)
Purpose: Securely authenticate to Git hosting services without typing credentials repeatedly.
Generate a new RSA 4096 key:
ssh-keygen -t rsa -b 4096- Accept defaults or specify a file location (e.g.,
~/.ssh/id_rsa). - Optionally add a passphrase for enhanced security.
- Accept defaults or specify a file location (e.g.,
View private and public keys (for verification):
cat ~/.ssh/id_rsa cat ~/.ssh/id_rsa.pub- Never share your private key (
id_rsa). - You typically add your public key (
id_rsa.pub) to your Git service’s SSH key settings.
- Never share your private key (
Add public key to GitHub/GitLab:
- Copy the contents of your
id_rsa.pubfile and paste into your chosen platform’s SSH key configuration.
- Copy the contents of your
3.2 Configure Git & GitHub CLI
Install Git and GitHub CLI:
sudo apt update
sudo apt install -y git gh
Configure GitHub CLI with Git:
# Set up GitHub CLI to handle Git credentials
gh auth setup-git
This will create the necessary credential helper entries in your
.gitconfig.Configure Git user information:
# Set your email and name for Git commits
git config --global user.email "[email protected]"
git config --global user.name "Your Name"
Authenticate GitHub CLI:
# For WSL environments without a browser BROWSER=echo gh auth login- Follow the printed URL and enter the code in your browser
- Select “HTTPS”
- Choose “GitHub.com”
- This will print a URL and 6 character code to login to GitHub via browser.
Verify your configuration:
# View your Git configuration
cat ~/.gitconfig

# Verify GitHub CLI authentication
gh auth status
4. Installing and Managing Repositories
Purpose: Enable additional Ubuntu repositories like universe so you have broader access to software.
- Add the Universe repository:
sudo add-apt-repository universe - (Optional) Manually add Universe if it wasn’t enabled:
sudo add-apt-repository "deb http://archive.ubuntu.com/ubuntu $(lsb_release -sc) universe" - Update the package list:
sudo apt update - Upgrade installed packages (recommended for a fresh environment):
sudo apt upgrade
5. Installing Essential Developer Packages
Purpose: Ensure you have the fundamental tools needed for building software (C/C++ compilers, SSL libraries, etc.).
- Install build-essential, pkg-config, SSL dev libraries, etc.:
sudo apt install -y build-essential pkg-config libssl-dev curl git - Install other helpful libraries:
sudo apt install -y autoconf automake libffi-dev zlib1g-dev cmake- Often required for building open-source software from source.
6. Installing and Configuring Rust
If you’re working in Rust, you’ll want to have the right version pinned.
Install Rust (pin a specific version):
curl --proto '=https' --tlsv1.2 -sSf https://sh.rustup.rs | sh -s -- --default-toolchain 1.84.0- This sets your default Rust toolchain to 1.84.0.
- Check out Rust Releases for more info on versioning and updates.
Load Rust environment:
source $HOME/.cargo/env- Makes
cargo,rustc, etc. immediately available.
- Makes
Verify Rust is installed:
cargo version- You should see something like
cargo 1.84.0 (9f89571 2023-08-03).
- You should see something like
7. Installing and Setting Up Neovim
Neovim is a modernized Vim fork, popular for its extensive plugin ecosystem.
7.1 Uninstall Old Vim (Optional)
If you prefer a minimal environment:
sudo apt purge nano vim vim-runtime -y
(Skip if you want to keep them.)
7.2 Install Neovim
sudo apt install neovim -y
Then, set up alternatives so commands like vim use Neovim:
sudo update-alternatives --install /usr/bin/editor editor /usr/bin/nvim 100
sudo update-alternatives --install /usr/bin/vi vi /usr/bin/nvim 100
sudo update-alternatives --install /usr/bin/vim vim /usr/bin/nvim 100
7.3 Python, Ruby, Node, and Perl Support
Neovim plugins often require multiple language bindings:
Python and pip:
sudo apt install python3 python3-pip -yRuby, Node.js, npm, Perl, cpanminus:
sudo apt-get install -y ruby-full nodejs npm perl cpanminusInstall Neovim support packages:
- Python:
pip3 install --upgrade pynvim - Ruby:
sudo gem install neovim - Node.js:
sudo npm install -g neovim - Perl:
sudo cpanm Neovim::Ext
- Python:
Create a Neovim config:
mkdir -p ~/.config/nvim
touch ~/.config/nvim/init.vim
echo "let g:python3_host_prog = '/usr/bin/python3'" >> ~/.config/nvim/init.vim
7.4 Verify Neovim Health
nvim --headless -c "checkhealth" -c "qa!"
(Or run :checkhealth from inside Neovim.)
8. Installing Docker
If you plan to develop and run containers locally, Docker is a common choice. These steps largely follow the official Docker Engine installation on Ubuntu .
Remove any existing Docker (if present):
sudo apt remove -y docker docker-engine docker.io containerd runc || trueInstall prerequisites:
sudo apt update
sudo apt install -y ca-certificates curl gnupg
Add Docker’s GPG key:
sudo install -m 0755 -d /etc/apt/keyrings
curl -fsSL https://download.docker.com/linux/ubuntu/gpg | sudo gpg --dearmor -o /etc/apt/keyrings/docker.gpg
sudo chmod a+r /etc/apt/keyrings/docker.gpg
Add Docker’s repository:
echo \
 "deb [arch=\"$(dpkg --print-architecture)\" signed-by=/etc/apt/keyrings/docker.gpg] https://download.docker.com/linux/ubuntu \
 \"$(. /etc/os-release && echo \"$VERSION_CODENAME\")\" stable" \
 | sudo tee /etc/apt/sources.list.d/docker.list > /dev/null
Install Docker:
sudo apt update
sudo apt install -y docker-ce docker-ce-cli containerd.io docker-buildx-plugin docker-compose-plugin docker-compose
Start Docker service:
sudo service docker startAdd your user to the
dockergroup (so you don’t needsudo dockereach time):sudo usermod -aG docker $USER newgrp docker- You may need to log out and back in for the new group membership to take effect.
9. Extra Shell Enhancements
9.1 Starship Prompt
A cross-shell prompt with extensive customization:
curl -sS https://starship.rs/install.sh | sh
Then, add to your .bashrc:
eval "$(starship init bash)"
Reload:
source ~/.bashrc
9.2 Neofetch
Show a quick system overview in your terminal:
sudo apt install neofetch
neofetch
9.3 FiraCode Font
For a slick monospaced font with ligatures:
sudo apt install fonts-firacode
10. Wrap-Up
And there you have it—my a la carte approach to turning Windows 11 into a surprisingly comfortable developer environment, powered by WSL2 Ubuntu, Rust, Neovim, Docker, and more.
Don’t forget that the tech world is constantly changing. Tools and distributions you swore off years ago might have evolved into something worth revisiting. Whether it’s Windows, Linux, or any other platform, keep an open mind and stay curious because you never know what’s around the river bend.
Happy hacking <3
Other Useful tools
Quick Notes
- Why Docker?
Docker is especially helpful for local testing of microservices, CI/CD pipelines, or container-based workflows—common in modern DevOps practices. - Neovim
For more details on Neovim configuration, see the official Neovim documentation . - Links & Versions
All steps above assume Ubuntu on WSL2. Always check official docs for the latest changes or differences between Ubuntu releases.
References
Quote from Franklin Delanor Roosevelt . ↩︎

